Reslice Module
The function reslice_image is used to deform images aligned to the individual anatomical image into SUIT space. We assume you have produced in the previous steps an isolation mask (sub-ex_T1w_cerebellum_dseg.nii.gz) and a deformation file (sub-ex_T1w_to-SUIT_mode-image_xfm.nii.gz).
[1]:
# Import necessary packages
from nilearn import plotting
import SUITPy as suit
import nibabel as nib
Reslice image without mask
The reslice function takes at the minimum 2 input parameters: The list of source images (the images that you want to reslice) and the deformation map.
[5]:
output_img = suit.reslice_image(source_image = 'sub-ex_T1w.nii.gz',
        deformation = 'sub-ex_T1w_to-SUIT_mode-image_xfm.nii.gz')
[7]:
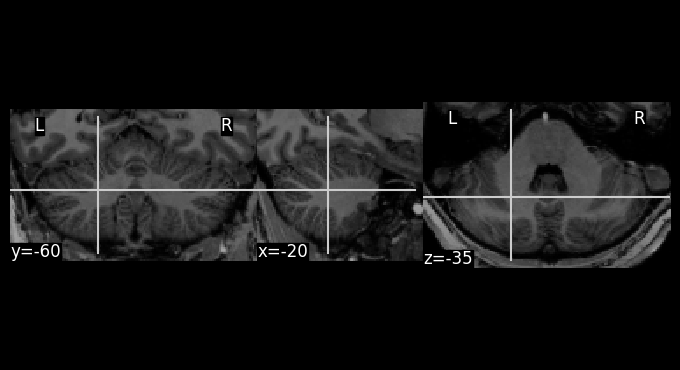
plotting.plot_anat(output_img,cut_coords=(-20,-60,-35))
[7]:
<nilearn.plotting.displays._slicers.OrthoSlicer at 0x3104a18d0>
To save the resliced image, use:
nib.save(output_img, "img1.nii")
Reslice image with mask
For cerebellar data analysis, we strongly recommend to mask functional data when reslicing. This prevents un-wanted spill-over of neocortical signal into the cerebellum during subsequent smoothing.
[9]:
output_img = suit.reslice_image(source_image = 'sub-ex_T1w.nii.gz',
        deformation = 'sub-ex_T1w_to-SUIT_mode-image_xfm.nii.gz',
        mask='sub-ex_T1w_cerebellum_dseg.nii.gz')
[10]:
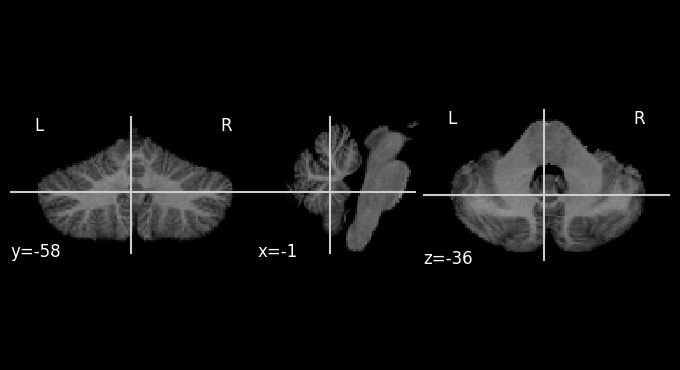
plotting.plot_anat(output_img)
[10]:
<nilearn.plotting.displays._slicers.OrthoSlicer at 0x36a5a00d0>
Specify voxel size
By default, the new image will be resliced into the same resolution and bounding box as template (1mm resolution for SUIT). For functional data we often would like a different resolution. For this, you can simply specify the voxel size.
[11]:
output_img = suit.reslice_image(source_image = 'sub-ex_T1w.nii.gz',
        deformation = 'sub-ex_T1w_to-SUIT_mode-image_xfm.nii.gz',
        mask='sub-ex_T1w_cerebellum_dseg.nii.gz',
        voxelsize=(2,2,2))
[12]:
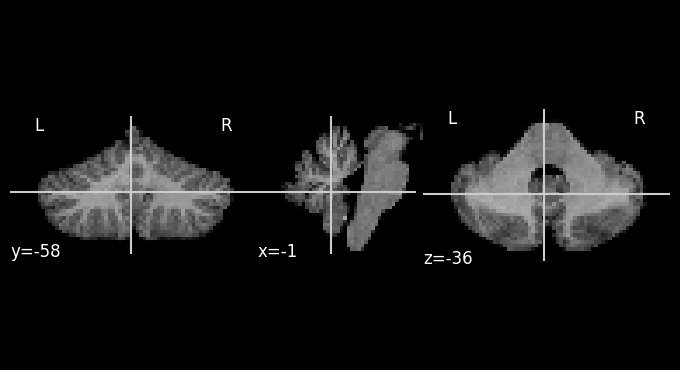
plotting.plot_anat(output_img)
[12]:
<nilearn.plotting.displays._slicers.OrthoSlicer at 0x36b669690>
[13]:
# Voxel size has been changed.
output_img.shape
[13]:
(71, 48, 44)
Specify output dimensions and affine transformation matrix
To fully specify the output dimensions of the data, you can also specify an affine transformation and a image dimensions
[14]:
output_img = suit.reslice_image(source_image = 'sub-ex_T1w.nii.gz',
        deformation = 'sub-ex_T1w_to-SUIT_mode-image_xfm.nii.gz',
        mask='sub-ex_T1w_cerebellum_dseg.nii.gz',
        imagedim = [100,50,30],
        affine = output_img.affine)
[15]:
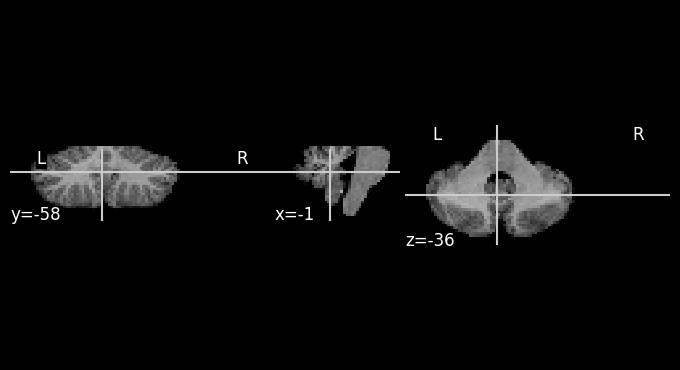
plotting.plot_anat(output_img)
output_img.shape
[15]:
(100, 50, 30)
Reslice atlas to individual space using the inverse deformation
If you want to bring a group template of atlas into the space of an individual, you need the inverse deformation file. To save that inverse deformation set write_inv_deformation to True.
[ ]:
# Set write_inv_deformation=True to save the inverse deformation file.
results = suit.normalize(source_file = 'sub-ex_T1w.nii.gz',
                 mask_file = 'sub-ex_T1w_cerebellum_dseg.nii.gz',
                 write_inv_deformation=True,
                 verbose = 0)
The inverse deformation is saved as sub-ex_T1w_from-SUIT_mode-image_xfm.nii.gz.
We can then reslice any atlas, such as the Buckner networks, from SUIT into the individual space.
Note: because the atlas is a label file, we need to use nearest-neighbour interpolation here
[ ]:
# reslice the Buckner atlas from SUIT space to individual space using the inverse deformation.
buckner_img = suit.reslice_image('Buckner_17Networks.nii',
                   deformation = results['inv_deformation'],
                   interp=0)
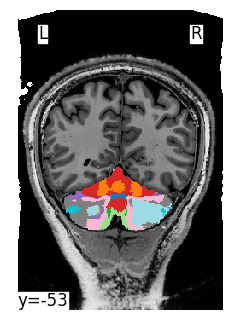
[ ]:
plotting.plot_img(buckner_img,display_mode='y',threshold=0.1, cut_coords=[-53.0], bg_img='sub-ex_T1w.nii.gz',colorbar=False,cmap='tab20')
<nilearn.plotting.displays._slicers.YSlicer at 0x3249da610>
Using deformation maps from SUIT(Matlab)
The reslice module can also be used to reslice images from individual that was normalized with the MATLAB version of the SUIT toolbox. We assume that you have run suit_normalize_dartel.m (see here for documentation), The reslice module requires the result of the normalization step as a non-linear deformation file. In Matlab you can produce this file using the following
command:
suit_save_darteldef(<name>, 'wdir', <dir>)
Where <name> is the name of the original anatomical and <dir> the suit working directory (defaults to current directory). This function produces y_<name>_suitdef.nii as an output. This image can then be used instead of the *_xfm.nii.gz file in SUITPy to reslice anatomical and functional images into atlas space.