Use isolate as a python module
This example shows the use of the isolate function by importing it directly to your python environment. isolate generates a mask for the cerebellum and brain stem for a T1w and/or T2w anatomical image. The mask is then used in the subsequent normalization step, but should also be used to prevent contamination of data from the abutting neocortex into the superior cerebellum (see below)
[1]:
# Import necessary packages
from nilearn import plotting
import SUITPy as suit
import nibabel as nib
import ants
Basic usage
In the simplest case, isolate function takes just the T1-weight image as a parameter:
[2]:
# This function generates isolation mask for the cerebellum based on a T1 scan and return it as ANTsImage
mask = suit.isolate('sub-ex_T1w.nii.gz')
preprocessing sub-ex_T1w.nii.gz
isolating cerebellum using UNet model
Warning: NIftI spatial units are 'unknown'. Assuming mm for spatial dimensions.
Warning: NIftI time units are 'unknown'. Assuming seconds for time dimension.
postprocessing
saving results to sub-ex_T1w_cerebellum_dseg.nii.gz
The binary mask image for the cerebellum is saved in the same directory as the source image as <basename>_cerebellum_dseg.nii.gz.
[3]:
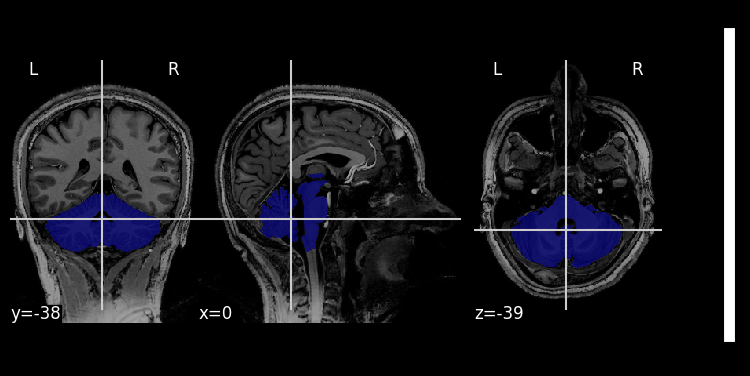
# Visualize the results:
img = nib.load('sub-ex_T1w.nii.gz')
mask = nib.load('sub-ex_T1w_cerebellum_dseg.nii.gz')
plotting.plot_roi(mask,img)
[3]:
<nilearn.plotting.displays._slicers.OrthoSlicer at 0x14265acc0>
Using T2 (and T1) image
The isolation Unet is also trained on T2-weighted images
[4]:
suit.isolate(t2_file='sub-ex_T2w.nii.gz')
preprocessing sub-ex_T2w.nii.gz
isolating cerebellum using UNet model
Warning: NIftI spatial units are 'unknown'. Assuming mm for spatial dimensions.
Warning: NIftI time units are 'unknown'. Assuming seconds for time dimension.
postprocessing
saving results to sub-ex_T2w_cerebellum_dseg.nii.gz
[4]:
ANTsImage (RPI)
         Pixel Type : float (float32)
         Components : 1
         Dimensions : (128, 128, 128)
         Spacing    : (1.0, 1.0, 1.0)
         Origin     : (-64.0, 114.0, -88.0)
         Direction  : [ 1.  0.  0.  0. -1.  0.  0.  0.  1.]
[5]:
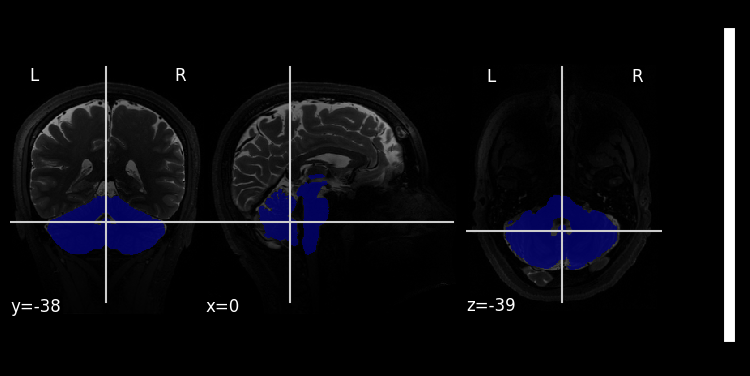
img = nib.load('sub-ex_T2w.nii.gz')
mask = nib.load('sub-ex_T2w_cerebellum_dseg.nii.gz')
plotting.plot_roi(mask,img)
/var/folders/vh/tsrrmndj3kj8fm3m4p51k3nc0000gn/T/ipykernel_14257/1157470123.py:3: UserWarning: Casting data from int16 to float32
  plotting.plot_roi(mask,img)
[5]:
<nilearn.plotting.displays._slicers.OrthoSlicer at 0x14297acc0>
Brain mask
isolate function has an optional parameter brain_mask_file to accept the subject’s brain mask (aligned with the input image). It can help the initial registration step, especially with input images includes significantly more or less non-brain structure than the template. Important: If the input image has already being skull stripped, the ``brain_mask_file`` is necessary. Otherwise, the initial registration would align the brain to a template that includes the entire head, which leads
to inaccurate results.
Registration (Additional function)
To obtain a robust initial affine transformation to get the bounding box correctly, the function isolate calls the function isolation.registration internally. It run ants registration multiple times to produce better alignment. Check the function reference for detailed usage. If the resultant isolation mask is not good, or seems cut-off on one side, it is likely that the initial registration step did not work well. You can try to run the registration function separately and check the
output. If the registration is not good, try to adjust the parameters of the registration function.
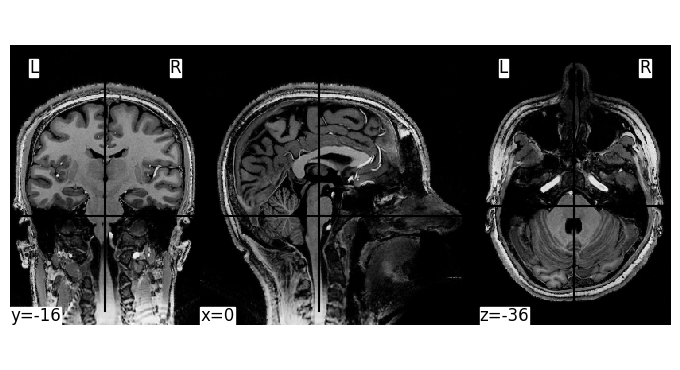
[6]:
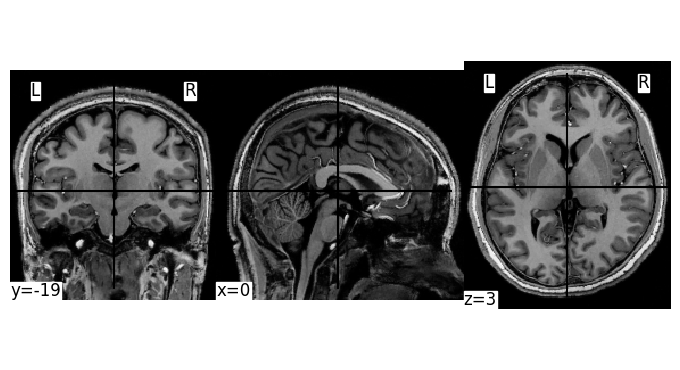
# This is visual comparison of img and template
img = nib.load('sub-ex_T1w.nii.gz')
template =ants.image_read('../../../SUITPy/templates/tpl-MNI152NLin6Asym_T1w.nii.gz')
plotting.plot_img(img, colorbar=False)
plotting.plot_img(ants.to_nibabel_nifti(template), colorbar=False)
[6]:
<nilearn.plotting.displays._slicers.OrthoSlicer at 0x142bb86b0>

[7]:
# The function return the ANTsTransform
img = ants.image_read('sub-ex_T1w.nii.gz')
trans, status = suit.registration(img=img, max_iterations=5, mi_lower=1.22, mi_upper=1.23)
transformed_img = ants.apply_ants_transform_to_image(trans, img, template)
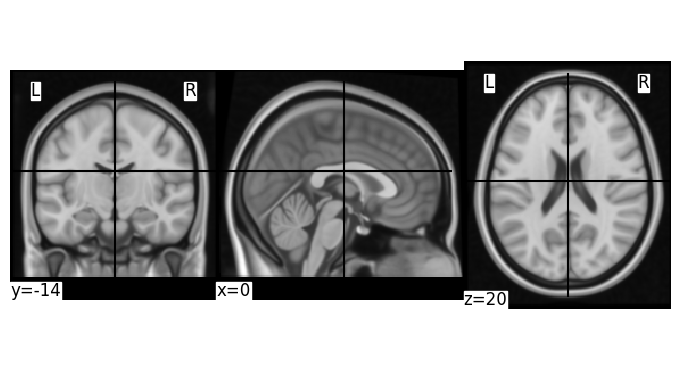
[8]:
# img after registration
plotting.plot_img(ants.to_nibabel_nifti(transformed_img), colorbar=False)
plotting.plot_img(ants.to_nibabel_nifti(template), colorbar=False)
[8]:
<nilearn.plotting.displays._slicers.OrthoSlicer at 0x142bb96d0>